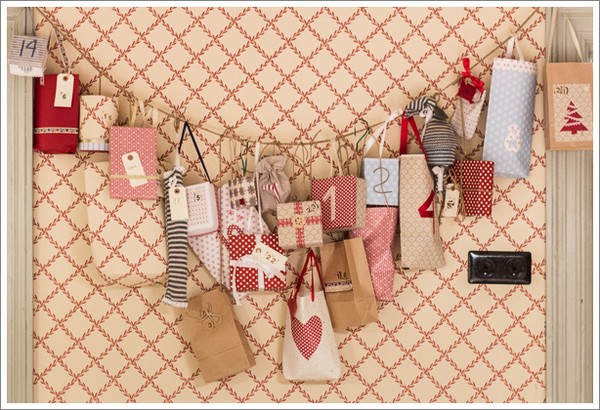
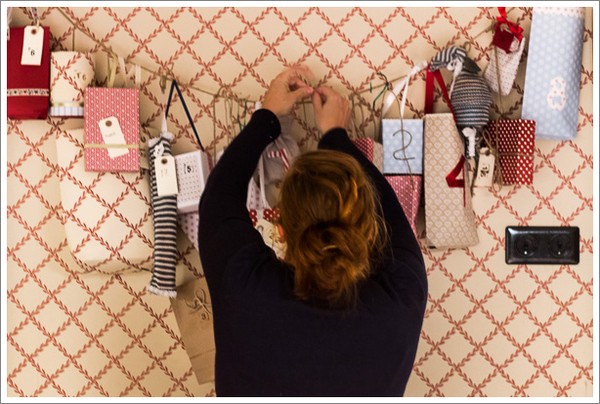
DIY Advent Calendar
Christmas came early this year!
I love Christmas and I love to wait and long for it. I usually don't do anything Christmassy until either the first of December or the first of Advent, whichever comes first, but this year is different. Partly it's because my dear friend Anna is leaving the country for six months at the end of November, and we had this Advent calendar for her son to finish before that.
Said and done. Last Sunday we met up at her place and were crafty all day long, resulting in this calendar with bags and boxes of different shapes and sizes, filled with gifts - one each day up until the 24th, which is the day we celebrate here in Sweden.
Enough with words. I'll let these pictures speak for themselves.


Tjugo - that's 'twenty' in Swedish

Easter Cards
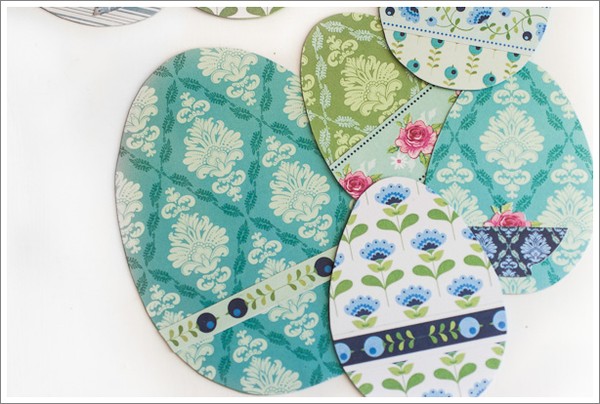
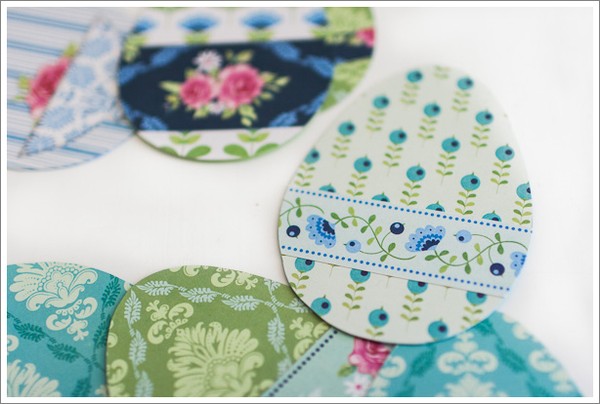
Colorful cardstock in cute combinations make pretty easter cards.
Download and print an egg shaped template from the web, and let your creativity run wild.
Jag har använt Tilda Designblock Summerblues från Panduro. Älskar färgerna och mönstren!
Bird Cake

No. I haven't made a cake of birds (I'm vegetarian, remember), but a cake for birds
Since Saturday brought cold weather (-12°C/10°F) I decided to make something for the birds to cheer them up. It's really easy and fun!
Melt coconut fat in pot, slowly on low temperature. I repeat, low temperature, otherwise you might start a fire. When melted, add a lot of goodies for the birds like seeds and nuts. Let it cool and 'clog' just a little bit in the pot before moving it over to a spring form. Keep cool and once the fat is stiff enough, you're ready to release the cake from its form (a knife might come in handy) and hang it in a tree for the birds to feast on.
Bon appétit!
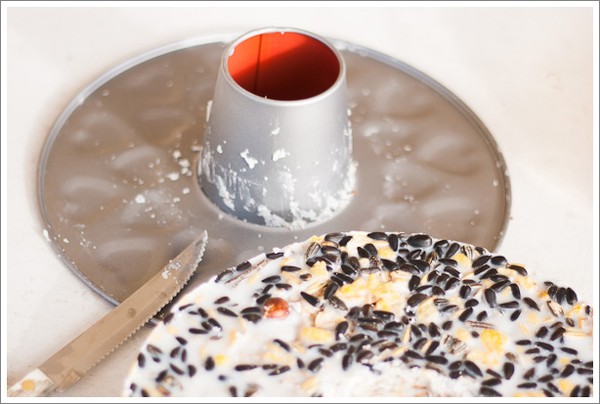
I used 500 g coconut fat for this cake
Eftersom lördagen förde med sig kallt väder och minusgrader (hela tolv stycken på morgonkvisten) så bestämde jag mig för att göra en kaka till fåglarna för att muntra upp dem. Ett lika enkelt som trivsamt helgnöje!
Smält kokosfett i en kastrull på låg värme. Jag upprepar, låg värme, annars finns risk att du startar en eldsvåda. När fettet har smält rör du i en massa gott till fåglarna, som frön och nötter. Låt röran svalna och tjockna en aning i kastrullen innan du häller över den i en kakform med löstagbar kant. Ställ kallt, utomhus till exempel, och vänta tills fettet har stelnat helt. Då är det dags att ta loss kakan från formen (en kniv kan vara bra att ha till hands) och hänga upp den i ett träd för fåglarna att festa på.
Bon appétit!

Things to do with Modeling Clay


I love to create in 3D, using my hands to form a shape, a physical object. Feeling the clay in my hands is almost therapeutical.
Instead of a Christmas tree, we have a few bare branches that I've spray painted white. They're dressed with mini-light strands (two of Ikea's battery operated Stråla), and a few hearts and stars made of oven-hardening modeling clay.
The heart shaped ornaments have been rolled out on a piece of lace fabric and the stars were sprinkled with some glitter before baking.
I also made two candle holders using the same technique as for the hearts, with the lace. I like the texture it gives.
I'm spending a quite day at home today, trying to recover from last nights Christmas party and refresh before a christening ceremony tomorrow.
Hope you're having a wonderful weekend!

Jag tycker verkligen om att skapa i 3D. Att forma en liten bit av världen med mina händer. Att känna leran mot huden är nästan som terapi.
Istället för julgran har vi tagit in några grenar som jag har spraymålat vita. De är klädda med ljusslingor (två av Ikeas batteridrivna Stråla) och hjärtan och stjärnor som jag pysslat ihop av modellera.
Hjärtana har jag kavlat ut på en spetsduk och stjärnorna strösslade jag lite glitter över innan de bakades i ugnen.
Det blev också två värmeljushållare, gjorda med samma teknik som hjärtana. Jag tycker om mönstret och texturen som spetsduken ger.
I dag har vi en lugn dag på hemmaplan. Jag försöker återhämta mig från gårdagens julfest och piggna till inför morgondagens barndop.
Hoppas du har en underbar helg!

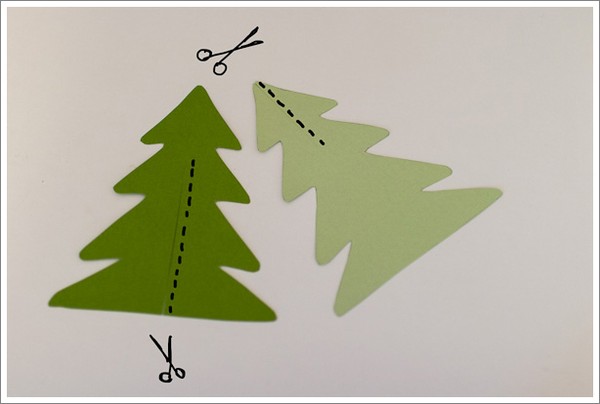
Paper Christmas Trees

Very easy. Just for fun. Add a string and hang them from your real Christmas tree, or in a window.
Advent Candlestick with Playing Cards
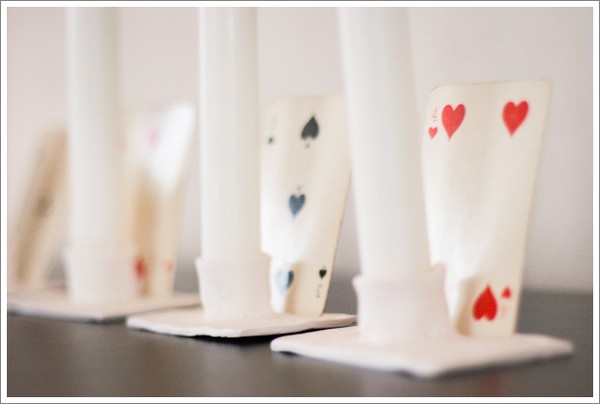
Tomorrow when we light the first candle, to mark the first Sunday of Advent, it will be with these candlesticks that I made from oven-hardening modeling clay last week. And I got to use my deck of vintage playing cards again!
And yes, everything is awry and skew; the image, the candles, the wallpaper, me, the world... Let's just light a candle and try to enjoy it.

I morgon när vi tänder det första ljuset, för att fira första advent och den nära förestående julen, så blir det med de här ljusstakarna som jag gjorde av modellera som "bränns" i vanlig ugn. Och så fick jag ett tillfälle att använda de gamla spelkorten igen!
Och ja, du ser rätt, allt är snett och vint; bilden, ljusen, tapeten, jag, världen... Jag tänder ett ljus och försöker njuta av galenskapen helt enkelt.
Jag använde den här leran, från Panduro såklart. Jag tyckte att den var ganska trög och svårarbetad, plus att leran mjuknade igen när den kom i kontakt med värme. I ugnen höll den sig bra, den flöt inte ut eller så, men jag gjorde ett par ljuslyktor också och upptäckte att väggarna började bågna av hettan från värmeljusen...
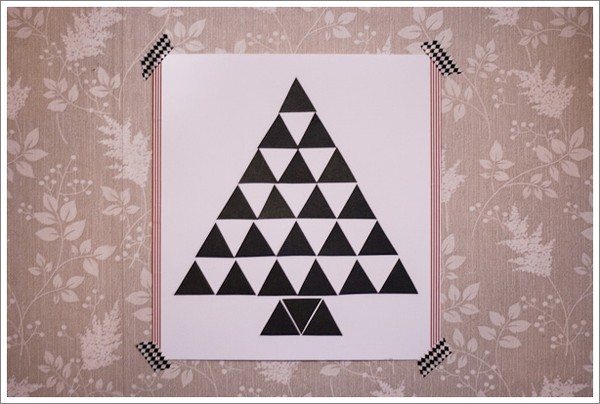
DIY Graphic Advent Calendar
You need:
- Card stock, black and white
- A pair of scissors
- MyStik taperunner
- Pen, pencil and rubber
- Washi tape (optional)
How to:
- Cut 24 triangles of the black card stock.
- Place them on the white card stock in the shape of a Christmas tree, mark with a pencil.
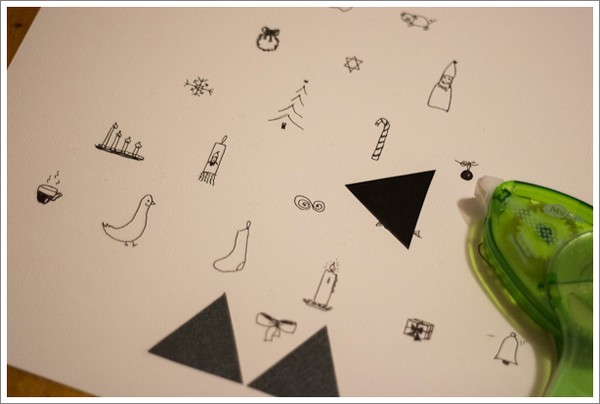
- Inside the marks, make Christmas inspired drawings. Erase the pencil marks.
- Attach the triangles over your little drawings, using the MyStik taperunner on the triangles, not on the white card stock. The MyStik is a clever invention, because you can remove it from the surface without any marks, and the ones you might get can easily be rubbed off with a finger. Please note that it will stick to one of the surfaces though (the one you 'glue' it on).
- Decorate with some washi tape.
From December 1, remove one triangle a day. Voilà, it's Christmas!
Du behöver:
- Lite tjockare pappersark, ett svart och ett vitt
- Sax
- MyStik taperunner
- Bläckpenna, blyertspenna och suddgummi
- Eventuellt washitejp att dekorera med
Så här gör du:
- Klipp ut 24 små trekanter av det svarta pappersarket.
- Placera ut dem på det vita pappret i form av en julgran och markera försiktigt med blyertspennan.
- Rita julinspirerade teckningar innanför markeringarna. Sudda ut markeringarna.
- Fäst trekanterna ovanför de små bilderna genom att dra med MyStik taperunner på de svarta trekanterna, inte på det vita arket. MyStik taperunner är en smart uppfinning, det går nämligen att lossa de två arken från varandra utan att det blir några märken. Skulle det bli några, är det lätt att gnugga bort dem med fingret. Notera dock att MyStik kommer att sitta kvar på en av ytorna (den du 'klistrade' mot).
- Dekorera eventuellt med lite washitejp.
Sedan är det bara att ta bort en liten triangel varje dag från och med första december och - voilà, det är jul!

Paid it Forward
Remember the Pay it Forward challenge I took part in a while ago? It was something I stumbled upon over on JellyBones, and couldn't resist. By commenting on her post I would receive something handmade by her, but, in return, I would have to send something handmade for three other bloggers.
With pleasure.
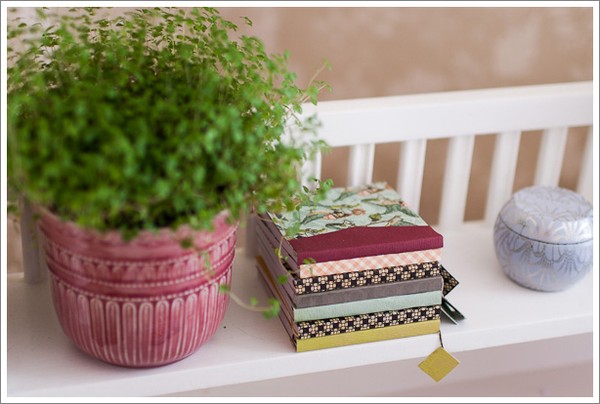
I made small notebooks for everyone as the 'main gift', and added a little something extra for each of them, based on what I know about them from their blogs.
Minns ni Pay it Forward-utmaningen som jag deltog i för ett tag sedan? Jag snubblade över idén hos JellyBones och kunde inte motstå frestelsen att vara med. Genom att kommentera hennes inlägg skulle jag få något handgjort från henne, men i utbyte skulle jag också skicka något handgjort och hempysslat till tre andra bloggare.
Sagt och gjort. Jag kreerade små anteckningsblock som "huvudgåva", och plussade på med nåt litet extra för var och en av dem, baserat på vad jag känner till om dem från deras bloggar.

Jess over on Bells, Bowls, & Bobbins got the orange notebook and a recipe for Swedish cinnamon rolls (kanelbullar) as she likes baking.

Karolina from Joahi got a green, polka dot notebook and what we in Sweden call a 'flea' (I just learned that it's called a Paper Fortune Teller in English), filled with daily challenges such as 'give a smile to a stranger' and 'get in touch with someone you love'. From time to time, Karolina shares wisdoms on how to tackle life, and that inspired me to make this for her.
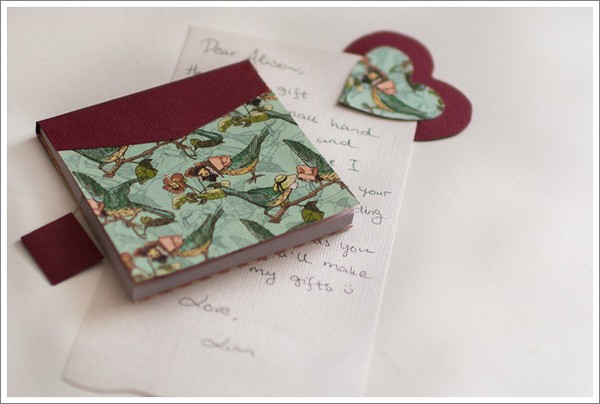
Alison from The Book of Love got the one with the birds, along with a bookmark in the shape of a heart, because she loves to read.
Thanks to you lovely ladies for participating and paying it forward! ♥
Playing with Cards


I laid my hands on a deck of cards from 1946 at a thrift store a while ago. I used to collect playing cards when I was younger, and I’m seriously thinking of starting again, this time with a focus on vintage decks. There’s just something about playing cards that fascinates me….
This one can’t be a part of the collection though, ‘cause it’s no longer complete. I turned a few of the cards into a… well… what is it? Imagine a four paged note book.
I used four cards at a time and glued a piece of cardstock of the same size (just a little bit wider) on top, and made a fold between each card. It’s pretty much self-explanatory, right?
I used them as letter paper and the one I’ve got left will probably be turned into some kind of Christmas decoration.
Any other ideas of what to make of playing cards?
Talking about Christmas. I’m already getting into the Christmas spirit, but I prefer not to make a false start. Christmas here at Lyckoland starts in small scale November 15, and then, first Sunday of Advent, I’m throwing myself head over heels into mulled wine, gingerbread, and all kinds of Christmasy crafts. I hope you'll join me in celebrating a hand made Christmas!


Jag lyckades lägga vantarna på en kortlek från 1946 på Myrorna. Jag samlade på spelkort när jag var yngre, och jag funderar faktiskt på att börja igen, men nu med fokus på gamla kortlekar. Jag vet inte riktigt vad det är, men spelkort fascinerar mig…
Den här kan tyvärr inte vara del av någon samling längre, för den är inte längre komplett. Jag använde några av korten till…. ja… vad är det egentligen? Föreställ dig en liten, fyrsidig anteckningsbok.
Jag tog fyra kort och la ut dem bredvid varandra. Därefter limmade jag fast ett lite tjockare papper ovanpå dem, och gjorde ett litet veck mellan varje spelkort. Ja, det är väl egentligen ganska självförklarande.
Jag använde dem som brevpapper, och den som blev över kommer jag nog att använda som juldekoration på något sätt.
Andra bra idéer vad man kan göra av spelkort?
På tal om jul förresten. Jag har redan kommit i julstämning, men jag tänker inte tjuvstarta. Här i Lyckoland startar julen i liten skala den 15 november och sen, första advent, kastar jag mig huvudstupa ner i glögg, pepparkakor och allehanda julpyssel. Hoppas du hänger med och firar en handgjord jul tillsammans med mig!

Weather Forecast #2

Umbrella, cloud and rain drop pencils. I'm embracing my inner child!
I've been engaging in a lot of easy paper crafts lately. Small projects to keep my hands moving and my mind both focused and relaxed at the same time.
Remember my last weather forecast? Here's another one, and you might not want to hear this, but I'm still predicting some heavy rain... Better equip yourself with an umbrella.
We're celebrating Friday and the weekend with homemade pizza, and I wouldn't be surprised if I found myself in the couch later on, with a cup of tea and a movie.
One of the best things about going back to work is definitely the weekends! Have a great one, ok?
Washi Tape Tealights

Decorate tealights with washi tape. It doesn't get much easier than this!

DIY Leaf Stamp Stationery

Having pen pals again is a dream come true! I love everything about it, from the letter writing to the waiting, waiting and waiting… and then! Receiving a longed for answer.
What usually happens is that I struggle all day long to resist the urge to tear the envelope open straight away, and then, in the evening, I cozy up in the sofa with a cup of tea, reading my letter. You know, instead of watching TV.
It’s also a great way to satiate the creative hunger. Making your own stationery is so much fun!
Here’s the most recent one, with leaf stamps. It’s a technique I learned from Delighted Momma.
How to:
All you need is paper for the stationery, leaves, paper towel and a hammer. Put the leaf on the stationery and the paper towel on top. Hammer until the green color start to soak thought the paper towel.
I made a few attempts with autumn leaves, but most of them were to dry. You want a ‘juicy’ leaf for the best result.
In a minute or so I'm off to our neighbor town to meet with an old friend. I'm looking forward to a lot of girl talk :-)
I wish you a peaceful and happy Saturday!

Jag har nyligen börjat brevväxla (i vuxen ålder!) och det är lite av en dröm som går i uppfyllelse. Jag älskar varje liten del av det. Att skriva brevet. Att gå i väntans tider och förväntansfullt vittja brevlådan och endera dagen upptäcka att det ligger ett brev där. Ett handskrivet, vackert brev, bara till mig.
Oftast motstår jag frestelsen att slita upp kuvertet omedelbart. Istället väntar jag till kvällen, kryper upp i soffan med en kopp te och mitt brev, och sedan läser jag. Istället för att titta på teve.
Det är också ett ypperligt sätt att stilla den kreativa hungern. Att göra sitt eget brevpapper är hur roligt som helst.
Här är det senaste, med stämplar av löv. Det här snappade jag upp hos Delighted Momma.
Så här går det till:
Allt som behövs är pappret som ska bli ditt brevpapper, några löv, hushållspapper och en hammare. Lägg lövet på brevpappret och hushållspapper högst upp. Hamra försiktigt tills du ser att det gröna börjar ”blöda igenom” hushållspappret.
Jag gjorde några försök med höstlöv, men de flesta var för torra. Ett saftigt löv ger bäst resultat.
Om en minut eller två åker jag till grannstaden för att träffa en gammal vän. Ser fram emot en massa tjejsnack :-)
Önskar dig en superduperlördag!

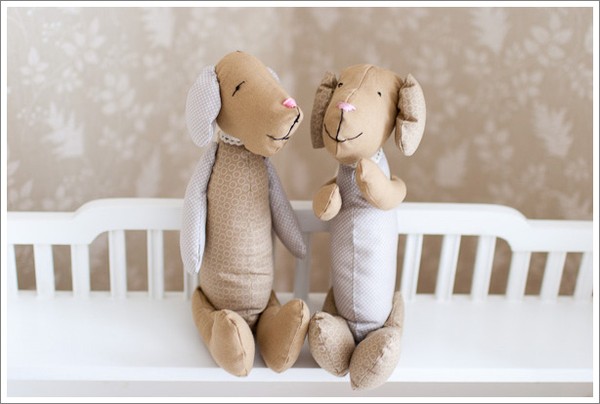
Puppy Love - Handmade Cuddly Toys
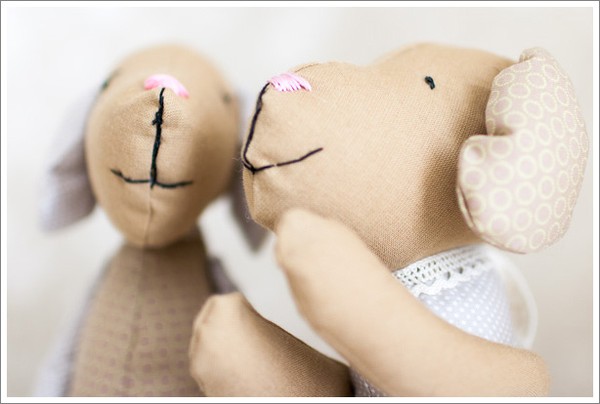
Meet The Puppies, engaged in a lively discussion. I guess they're talking about their future, as they were separated soon after this picture was taken. Left puppy is now the property of Charlie and right puppy belongs to Othilia, my goddaughter (Yes! I was asked to be a godmother, isn't that the coolest!?).
I admit: I'm super proud of these puppies. Because I made them! All by myself. And although it took me quite some time (actually around five hours per puppy...), it was so much easier than I thought it would be.
They are made from a pattern I bought ages ago. I allowed myself some freedom - like changing the fabrics and adding a little bell inside.
I hope they will be loved by their new owners.
Säg hej till hundarna, mitt inne i en livlig diskussion. Troligtvis pratar de om framtiden, eftersom att de strax efter att den här bilden togs skulle skiljas åt. Den vänstra vovven tillhör nu Charlie medan den högra finns hos Othilia, min guddotter (ja, jag har fått äran att bli gudmor - det är stort!).
Jag erkänner: Jag är superstolt över de här hundarna. För det är jag som har gjort dem! Alldeles själv. Trots att det tog sina modiga timmar (fem, närmare bestämt), så var det ändå mycket enklare än jag trodde att det skulle vara.
Jag använde mig av en materialsats från Panduro som jag köpte för flera år sedan, men bytte ut tyger och sydde även in en liten bjällra.
Jag hoppas att deras nya ägare kommer att ge dem mycket kärlek.

Featured on Panduro's Blog

Panduro is the place where I go to buy most of crafty equipment. They've got it all; cardstock, glue, fabric, paint, pens, stamps... Basically everything you need! I was so, so happy to see my restyled black tee featured on their blog yesterday.
Panduro kräver väl knappast någon närmare introduktion för er svensktalande? På deras blogg finns nu min pimpade svarta t-shirt. Pysslarens dröm är uppfylld :-) Kika in, vettja!
Weather Forecast

Today I'm bringing you the weather forecast through my recent crafty adventures with tissue paper (silkespapper). Raindrop garlands, a rain cloud and two collages (that didn't turn out like I expected or wanted to, but I'm showing them to you anyway).
Tissue paper is awfully time consuming to work with and you have to be awfully careful not to tear it, but I love the delicate, see-through effect, especially when placed in a window.
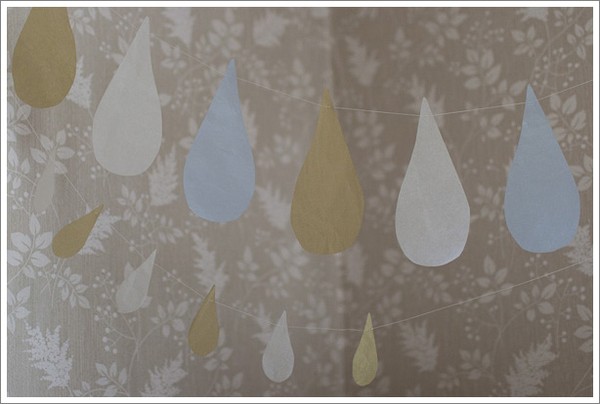


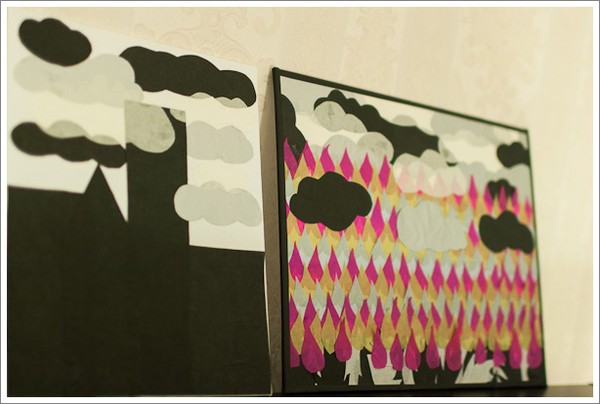
The pink/gold/light blue things are raindrops - NOT baby santas, treetops or flames, like Boyfriend suggested...
DIY Red Wine Birthday Card
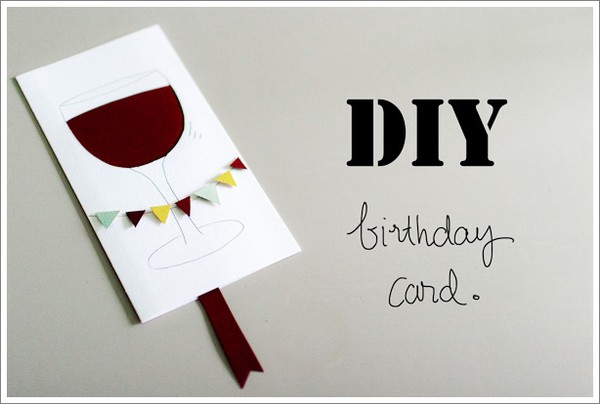
Tonight we're celebrating my sister-in-law's birthday (and my dad's, but that would be another post). She's getting a few wine related gifts, so I decided to make a card on that theme.
What you need:
- Scissor, glue, scalpel, tape or craft foam pads (klisterkuddar in Swedish), and a pen.
- Red cardstock (and a few small pieces of other colors if you want to make the garland as well).
- White cardstock, cut into the size you wish and folded in half.

How to make it:
- Fold your card.
- Draw a red-wine glass shape on your card and cut along the side and bottom of the cup (on the 'front page' of the card only)
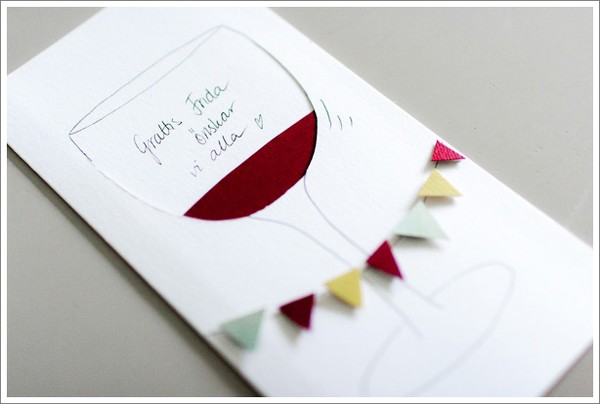
- Cut a similar shape out of the red cardstock, but just a little bit wider and with a loooooong foot.
- Place the red cardstock inside the card (and the cut) like shown in the picture.
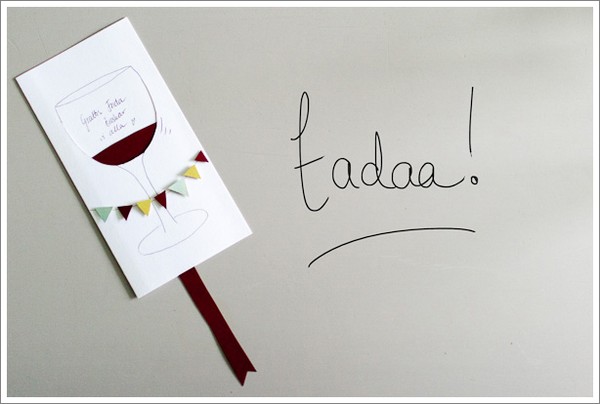
- Open your card and mark where the 'wine' should stop (you don't want it to be pulled too far, or it will be hard to get it back in place). Make a 'stop' by using craft foam pads or tape.
- Glue the card together along the sides (top and side, don't glue the bottom).
- Write your greeting under the red wine.
- I made a garland also out of small triangles of cardstock on craft foam pads.
Hope you're having a splendid Saturday!
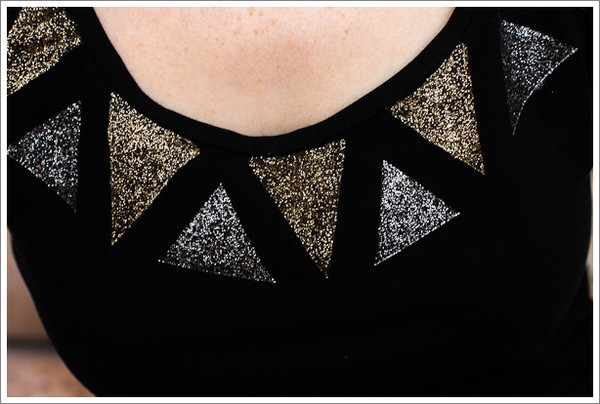
Restyle: Glittering Geometric Neckline

My Pinterest boards are filled with eye-catching collars and geometric shapes and patterns. I believe it’s a trend that survives at least this season as well.
An easy way to draw attention to the neckline is to restyle one of your practical but – admit it – rather dull black tees with some fabric paint. Easy, fast and fun!
- Go get some fabric paint in the colors you like. I chose tubes of glittering gold and silver from Pébéo for a fancy look.
- Wash your garment before painting it.
- Put something in between the front and back of the garment for protection, the paint might bleed through the fabric.
- Now, let your creativity run wild! Try some freehand painting if you dare, use a loam board, or simply some tape to build your pattern and cover the areas you don’t want to paint. I used a brush to make sure the paint got evenly distributed.
- Follow the instructions from the manufacturer of your paint. My tee had to dry for 12 hours before I could remove the tape and wear it, and I had to wait another 12 hours before washing it.
Can't wait to make some more experiments with this technique now that it's tested and proven!

Mina Pinterest-boards är fyllda med iögonfallande kragar och geometriska former och mönster. Jag tror att det är en trend som överlever åtminstone den här säsongen också.
Ett enkelt sätt att dra uppmärksamhet till halslinningen är att piffa till en av alla praktiska men i ärlighetens namn rätt så tråkiga svarta t-shirts med lite textilfärg. Det är lätt, går fort och är roligt!
- Skaffa textilfärg. Jag använda glitterfärg i guld och silver, närmare bestämt det här setet från Panduro.
- Tvätta ditt plagg innan du målar det.
- Lägg något mellan bak- och framsidan av plagget för att skydda den sida du inte målar på, färgen kan tränga igenom tyget.
- Nu är det bara att släppa loss kreativiteten! Måla på frihand, använd en schablon eller helt enkelt lite tejp för att skapa ditt mönster och skärma av de ytor du inte vill måla på. Jag använde en pensel för att fördela färgen jämnt.
- Följ instruktionen från tillverkaren av färgen. Min tröja var tvungen att torka i 12 timmar innan jag kunde ta bort tejpen och använda den, och ytterligare 12 timmar innan jag kunde tvätta den.
Är supersugen på att göra fler experiment nu när jag vet att det här funkar!
Restyle: Satin Ribbon Bangles
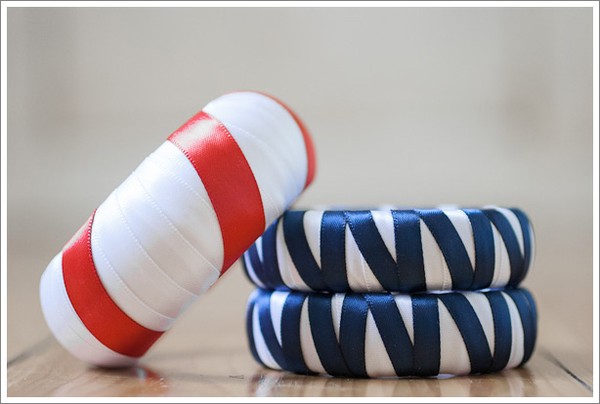
I made these satin ribbon bangles for my friend Anna on her 31st birthday a couple of weeks ago. Buy some chunky bangles and simply wrap satin ribbon around them. Attach each end with some glue (preferably on the inside, where it doesn't show).
It's really simple, and the opportunities are – as always – endless! Play around with different colors and patterns.
I will definitely make more of these.


DIY Handmade Notebook
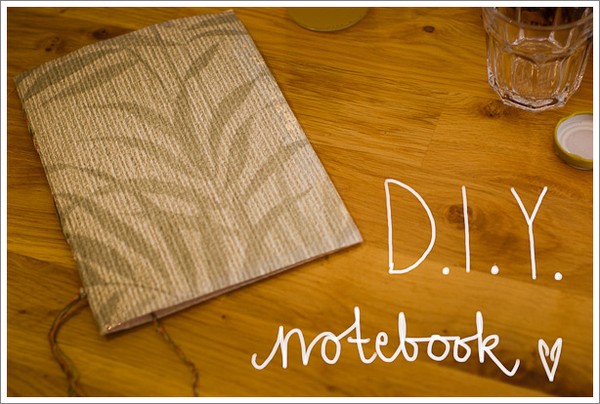
Visst kan du köpa en ny och fin anteckninsbok, men så mycket roligare att göra den själv! Det här är ett pyssel som legat och gnagt inom mig länge, länge. Nu är det gjort och jag är barnsligt nöjd!
Sure, you can buy a new and fancy notebook, but isn't it so much more fun to make one yourself? I've been wanting to try this DIY for such a long time. Now it's done, and I'm sooo proud!

1.
Välj ut ett antal pappersark som ska bli sidorna i din bok, inte för många om du som jag är nybörjare, då blir det svårare. Alla sidor behöver ju inte vara kritvita, pröva att blanda in gamla tidningssidor exempelvis. Jag slängde in två sidor från en fransk Elle från 50-talet och en papperspåse...
Choose sheets of paper for the pages of your book, not too many if you just like me are a beginner. All your pages don't necessary have to be white, try mixing in old newpapers for example. I used two pages from a 1950's French Elle and a small paperbag...
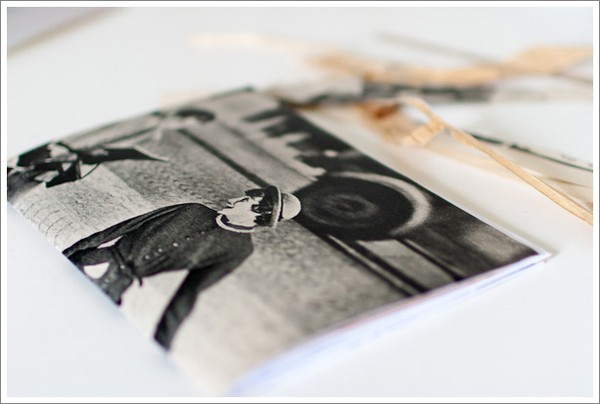
2.
Fold your paper sheets at the middle and place them inside each other.
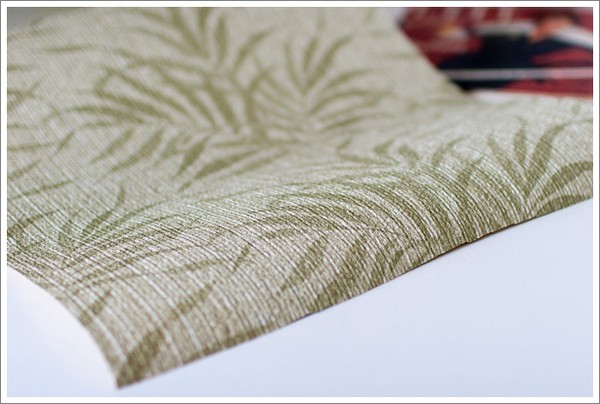
3.
Välj ditt omslagspapper. Jag använde en gammal tapet från mina morföräldrars hus.
Choose a cover. I used an old wall paper from my grandparents house.

4.
Klipp omslagspappret till önskad storlek, förslagsvis lite större än själva boksidorna.
Cut your cover to the size you want, preferrably just a bit larger than the book pages.
5.
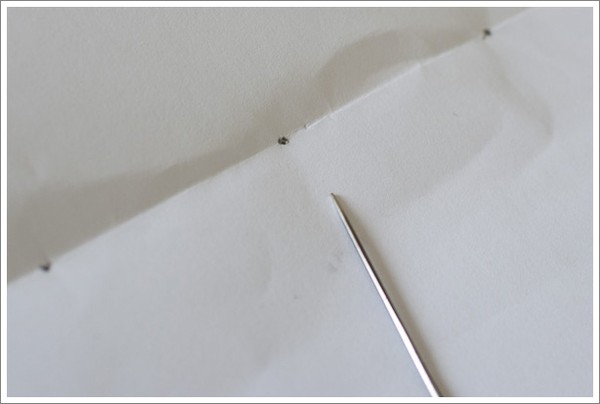
Use one of your paper sheets as a template and mark where you want holes to stitch it all together. The more holes you make, the more sturdy it will be, but also more time consuming. I decided that five holes was enough for me. Use a needle to make holes through your template and all the other book pages, a few paper sheets at a time is easiest. Make sure to place your holes evenly through all the pages of your book.


Använd ett pappersark som mall och rita ut var du vill ha dina hål för att sy ihop boken. Ju fler hål du gör, desto stadigare blir det, men också mer pilligt och tidskrävande. Fem hål fick räcka för mig. Använd en nål för att göra hål genom mallen samt alla andra boksidor, några i taget så går det lättast. Var noga med att sätta hålen jämnt.
Use one of your paper sheets as a template and mark where you want holes to stitch it all together. The more holes you make, the more sturdy it will be, but also more time consuming. I decided that five holes was enough for me. Use a needle to make holes through your template and all the other book pages, a few paper sheets at a time is easiest. Make sure to place your holes evenly through all the pages of your book.
6.
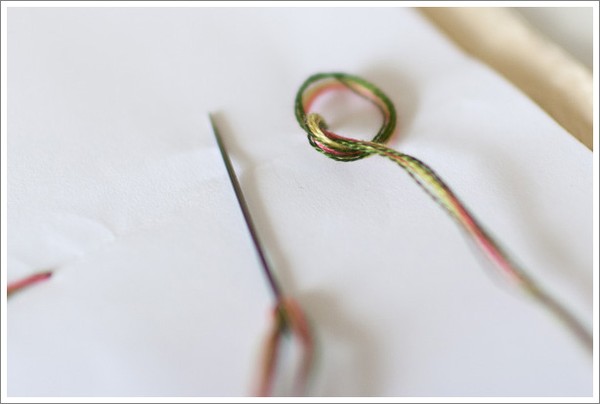
Choose a thread to stitch your book. I used embroidery thread in three different colours.
Välj tråd att sy ihop boken med. Jag använde brodyrgarn i tre olika färger.
Choose a thread to stitch your book. I used embroidery thread in three different colours.
7.
Du kan sy ihop din bok på säkert tusen olika sätt. Jag började längst ner på bokryggen och gjorde en liten tofs.
I'm sure there are a thousand ways to stitch your book. I started at the bottom of the spine of the book, and made a small tassel.
8.


Sy genom alla hålen och fäst tråden ordentligt när du är klar.
Stitch through all the holes and secure the end of the thread.
9.
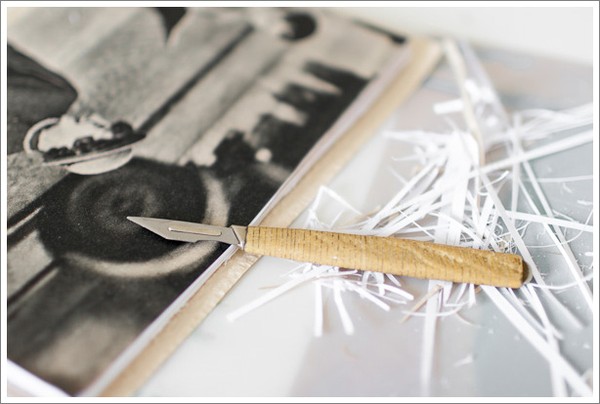
Med största sannolikhet kommer du att upptäcka att dina boksidor är lite olika långa (eller breda, kanske är mer korrekt att säga?). Så blir det ju när man viker dem på mitten och stoppar dem i varandra. Du kan jämna till dem med hjälp av en liten kniv, eller helt enkelt bestämma dig för att det är snyggt som det är.
You will most likely discover that the pages of your book are not of the same length (or is 'width' more correct?) now. That happens when you fold them at the middle and put them all together. You can use a small knife to correct it, or simply decide that you like it just the way it is.
10.
Jag satte helt vanlig tejp längsmed kanterna på mitt bokomslag för att göra det lite mer stabilt. Syns knappt.
I placed ordinary tape alongside my book cover, to make a little more firm. You can hardly see it.
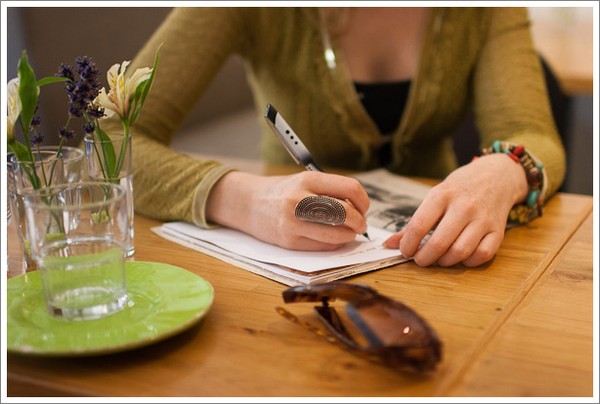
Klar! Nu kan du ta med din fina bok till ett café och väldigt diskret och heeelt oavsiktligt visa upp den för de andra cafébesökarna.
And you're done! Bring your cute and handmade notebook to the nearest café and show it, discreet and unintentional of course, to the other guests.
Currently Crafting: Knitting and Embroidering

Although I consider myself being quite a crafty and creative lady, there are certain materials and techniques that I still don't master. Basically, everything involving a needle, sewing thread, yarn or fabrics... But I'm trying, and I'm trying hard, to overcome this fear. Somehow, it just feels... lousy, not even being able to knit a simple scarf, or know at least some basic emboridery stitches.
So, last weeks vacation was partly spent with mom, and her teaching me (again) how to knit and how to embroider. That green thingy in the picture above will one great day become a scarf (hopefully before next spring) and below, well, I'm just playing around, trying to master chain and stem stitching to start with.

I'm thinking emboridery really could be my thing. Let's wait and see.